Why?
UI tests are obviously very important. There are some things you can only validate by actually rendering the UI — Browser compatibility, visual logic, colors, animations, etc. UI tests are also very easy to write. It’s easy to record UI tests, and these tests can be recorded by people with very little knowledge of programming. This is why many companies end up with an abundance of UI tests before they start to feel the burden of the ice-cream cone.
Testing through the UI is slow, which results in increasing build times, but most importantly, UI tests are flaky. As Martin Fowler puts it:
Even with good practices on writing them, end-to-end tests are more prone to non-determinism problems, which can undermine trust in them. In short, tests that run end-to-end through the UI are: brittle, expensive to maintain, and time consuming to run.
Since one test failure is enough to fail your build, you increase your odds for a false build failure exponentially for every UI test you add. If we assume that the chances of a single test to fail randomly are just 1 in 1000 runs, after writing 100 tests we should expect to have about 10% (😨) of false build failures. (Don’t get me started about test retries strategies)
1 – (0.999 ^ 100 tests) = 0.095 false build failure rate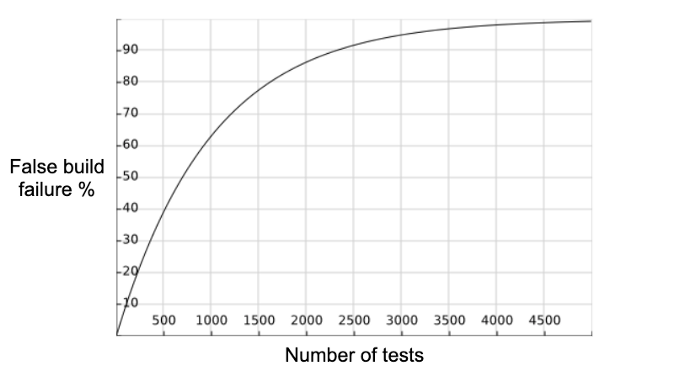
The testing pyramid
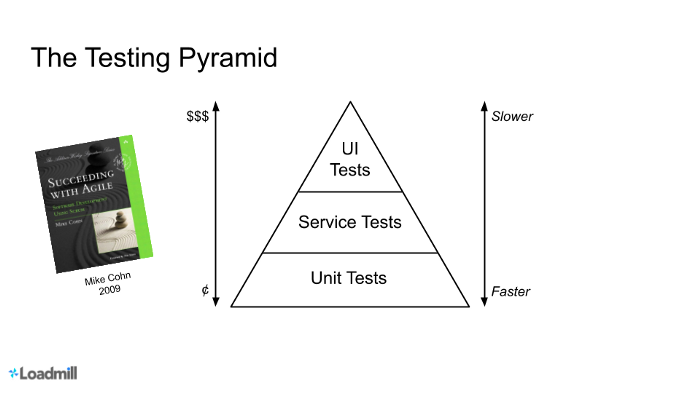
The test pyramid, as Martin writes, is a way of thinking about different kinds of automated tests that you want to have in your project to create a balanced portfolio.
In short, the wide base of the pyramid represents the fastest most cost-efficient tests that we have — Unit Tests, and the top represents our slower, more expensive UI tests. We want to make sure that we use UI tests to test only the UI code!
The pyramid also argues for an intermediate layer of tests that act through a service layer of an application… These can provide many of the advantages of end-to-end tests but avoid many of the complexities of dealing with UI frameworks. In web applications this would correspond to testing through an API layer while the top UI part of the pyramid would correspond to tests using something like Selenium.
To speed up your build cycle and make it more stable, I suggest eliminating those flaky UI tests that are actually used only to test backend logic, by converting them to API tests.
Selenium test example
For the purpose of this article, I created a short Selenium test, which creates a new blog post on my Ghost blog:
This tiny test runs in about 12–20 seconds but fails randomly from time to time when it fails to find some DOM elements. This test has nothing to do with the UI layer itself, and I use it only to test backend logic. Let’s convert it to an API test.
To run this test, clone the demo repository:
git clone https://github.com/loadmill/selenium-demo
And install its dependencies by running:
cd selenium-demonpm installTake a look at our test example at tests/my-test.js
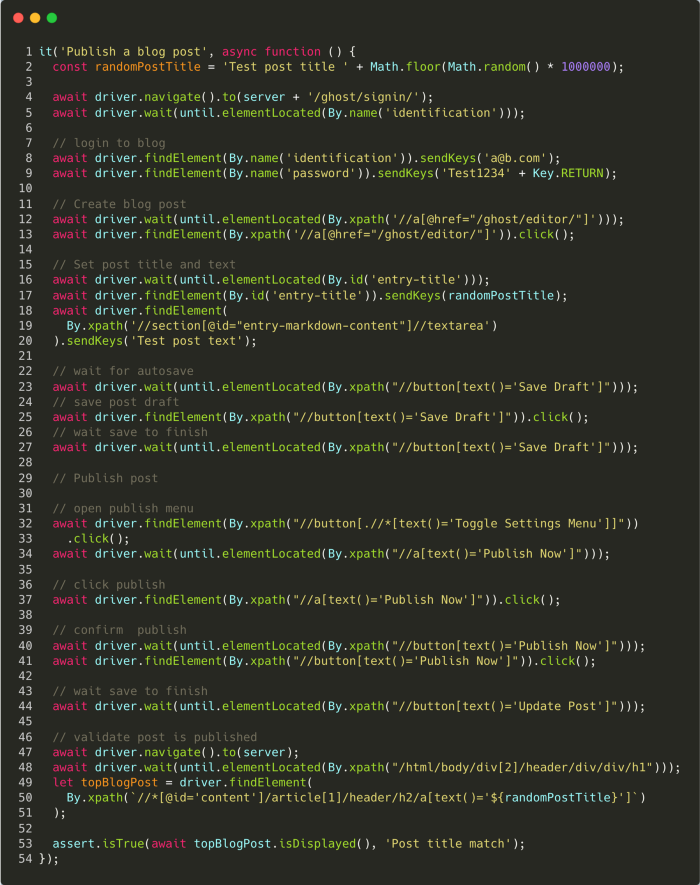
Yeah, this test isn’t very elegant, but it does represent the average Selenium test! 🤷♂️
Capture the network layer using Chrome DevTools Protocol
When recording a simple API test, I usually recommend using the Chrome network tab or the Loadmill Recorder to capture the network layer to a HAR file.
Since we want to capture the network layer programmatically and possibly do it for multiple Selenium tests, I choose a different strategy — using the Chrome DevTools Protocol.
The Chrome DevTools Protocol (CDP) allows for tools to instrument, inspect, debug, and profile Chromium, Chrome, and other Blink-based browsers. It is used by popular projects like Puppeteer and the VS Code — Debugger for Chrome.
I used it through the Node.js driver — chrome-remote-interface, which provides a simple abstraction of commands and listeners in a straightforward JavaScript API.
Using the CDP Fetch API and a few Node.js APIs, I was able to capture all the network requests and responses emitted by the test and store them in a single HAR file in 100 lines of code.
I wrapped this logic in a tiny npm package — har-recorder and embedded it in the before and after functions of my tests to start and stop the recording.
Run the Selenium test by running:
npm testAnd review the HAR file created in the root folder of the project.
Convert the captured HAR to API tests using Loadmill
Well, a HAR file is nice and all, but it is not a test, in fact, it is not even replayable. Some of its requests are dependent on hard-coded values, which should be dynamic.
We call these values Request Correlations.
Let’s say that my first POST request creates an item in my app and receives its ID in its response. My next request to GET this specific item is dependent on the ID, which was returned in the previous request.
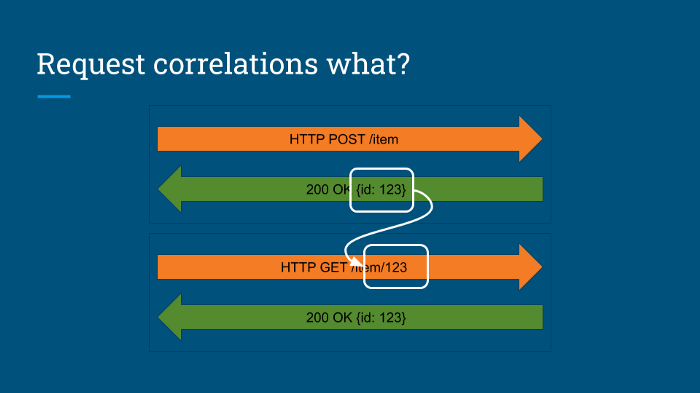
If I replay my HAR file recording, exactly as it was recorded, I will run into mismatching values (True for IDs, tokens and header values)
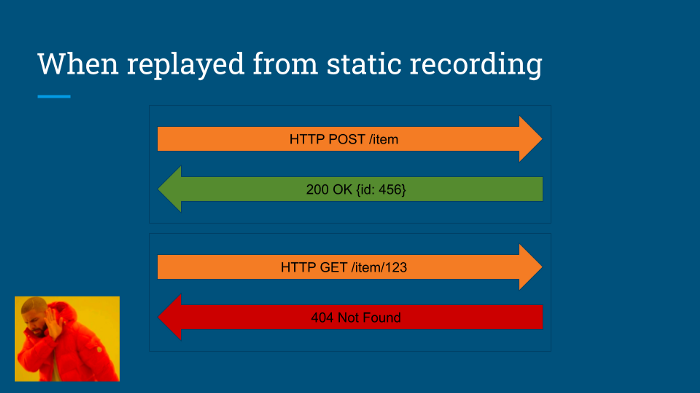
What we actually want to do in our API test, is to extract the response value from the first request, and use it dynamically in the dependent requests.
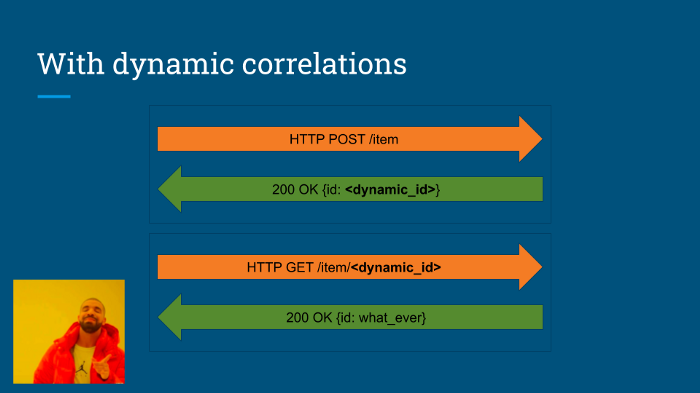
At Loadmill, we solve this problem by applying an automatic correlation algorithm to automatically extract these dynamic values to parameters and convert recording files into API tests.
Let’s see this works. Start by signing up for a free Loadmill account. Create an empty API Test Suite, and upload our HAR file to it using the IMPORT button at the top right corner.
After uploading the HAR file to Loadmill, we can see the correlations detected by the algorithm. For example, we can see that the ID of the created post is extracted from the response after it is created, and used in the next PUT request to publish the post.
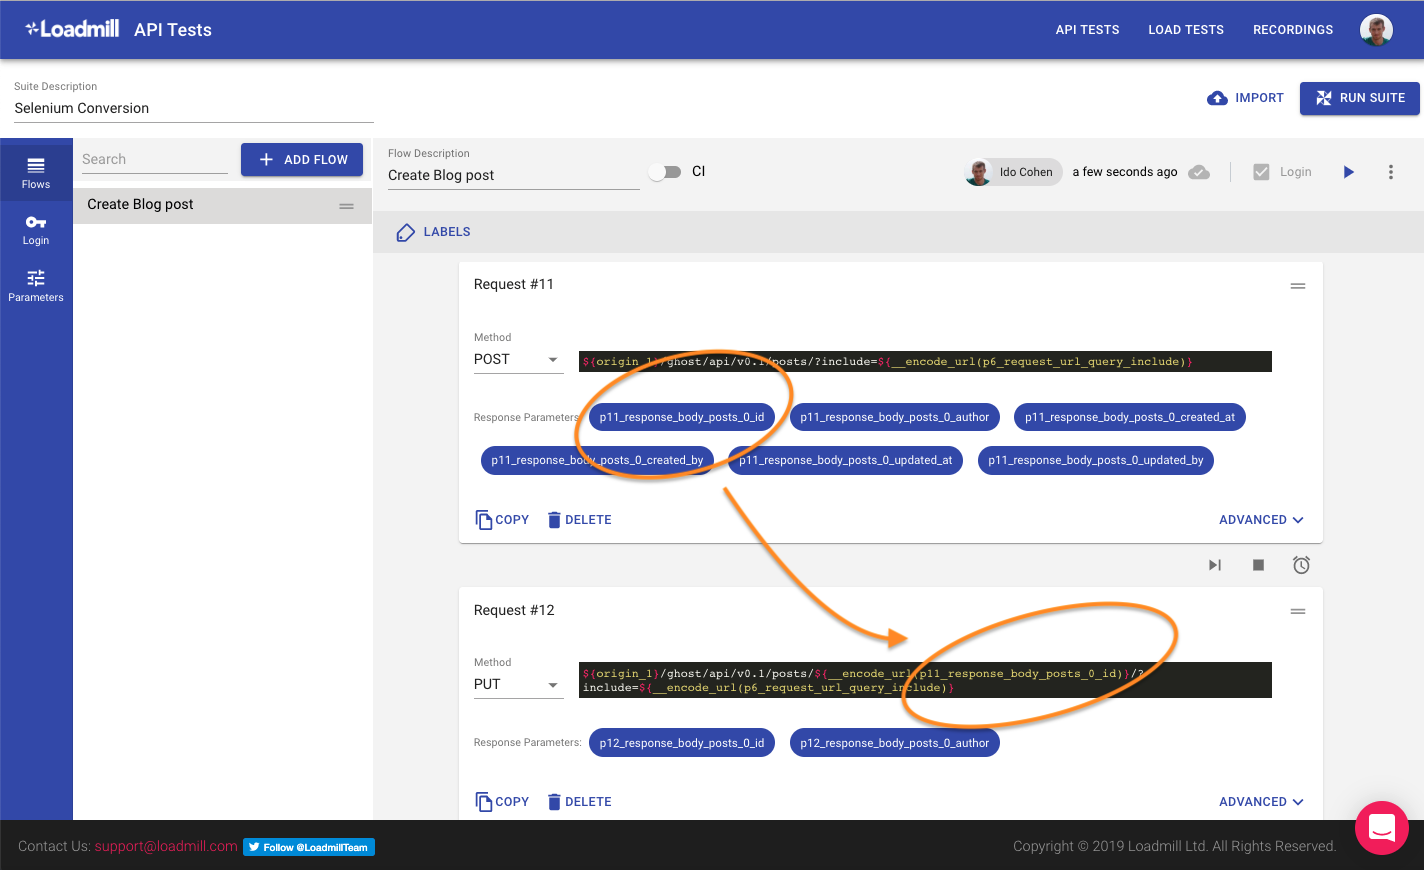
The ID of the created post is extracted from the response and used in the next request to publish the post
To make our test slightly more interesting, we can add some random values to it. Navigate to the parameters tab of the test suite, and update the value of the parameter representing the blog title to contain some random value using the built-in ${__random_number} function:
We can now run our API test suite and see that a new post is created on our blog.
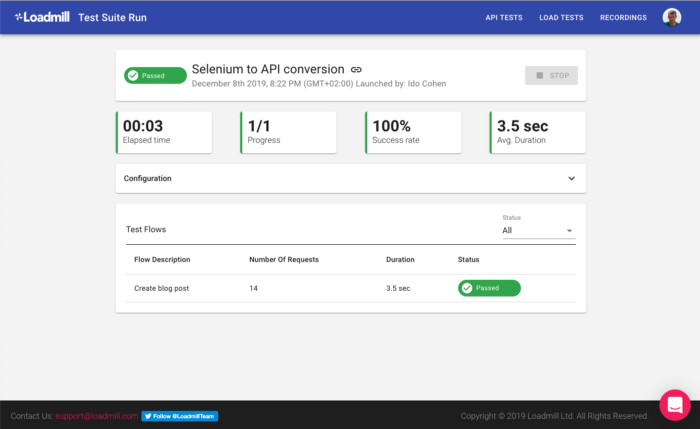
The test is running fast and stable 🎉
Note that this method can be easily scaled to a large collection of UI tests, by uploading the HAR files automatically using the Loadmill API (and not manually through the UI).
If you take only one point from this article, take the idea that you should always test your app from the right layer. Don’t write UI tests for things that can be tested using API calls, and don’t write APIs tests for logic that can be tested using unit tests.
You can use the method described here to take some of your problematic UI tests and convert them into API tests. This can help you speed up your build and test cycle with very little effort.
Feel free to use and contribute to my small HAR recording package. It is far from covering the full HAR spec yet, but I will expand it as I go.

